Adobe Creative Cloud Install - macOS
1. Go to the Adobe CC Install to begin the install process.
2. Your default internet browser will open the Adobe Creative Cloud Installer page. Click the Download Creative Cloud button.
3. Click Ok to Open with DiskImageMounter.

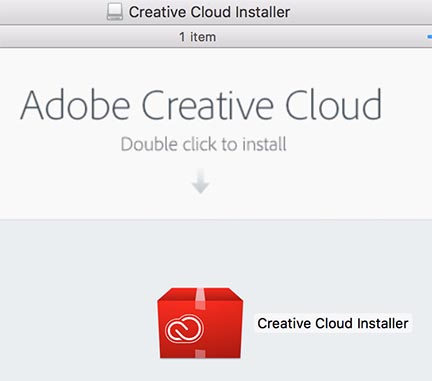
4. Open the Creative Cloud Installer in the downloads window of your internet browser and double-click the Creative Cloud Installer red folder to begin the install process.
5. Click the Open button to accept the security alert.

6. Open LaunchPad and click Self Service and Make Me Admin.
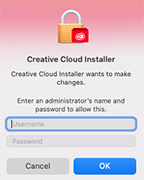
7. Go back to Adobe Creative Cloud and click Continue. When prompted, type your WSC Username and Password to approve the installion of CC.

8. Once Adobe Creative Cloud has installed, it will automatically open. Install each Adobe app one at a time. Adobe Creative Cloud will now have an icon on the top bar and will be used to keep your Adobe apps up-to-date.
Note: a red dot in on the Adobe CC menu bar icon denotes a notification; likely an update or finished install.
Please contact the Campus Service Center at 402-375-7107 or visit us in the library if you need further assistance.
Last Updated: 03/8/2022